Two excellent desktop FDM 3D printer kits are the ELEGOO Neptune 2 and the Creality Ender 3. Both printers offer fantastic features, however, we will be comparing the two based on filament run-out sensor, UI, and assembly. We will base our recommendation on user skill level and project needs.
ELEGOO Neptune 2
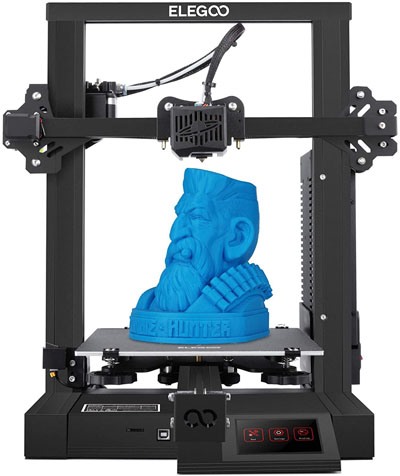
The Neptune 2 is a compact FDM 3D printer that will fit on any workbench without a problem. It offers reasonably fast assembly, filament run-out and power loss detection features, and a removable print bed.
Assembly
The printer comes from the manufacturer semi-assembled. All required tools for assembly come with the printer. Assembly is fast and easy, taking only 45 minutes at the most. Many sub-modules like the Z-endstop, Z-motor, and the extruder also come pre-assembled, making less work for the user.
This printer has aluminum extrusions for stability and a power supply mounted on the rear of the machine. It also features a controller board that is mounted beneath the build platform. The extruder is Bowden-style.
Filament Run-out Sensor and Power Loss Detection
If users are not sure they have enough filament but want to try their print anyway, they do not have to worry about running out of filament mid-print. The Neptune 2 features a filament run-out sensor. It is directly lined up with the extruder and utilizes a mechanical switch to determine the presence of filament. If filament run out is detected, the printing will automatically pause, protecting the print from ruin.
The printer also features power loss detection. It will recover printing following a power loss at the exact spot it was paused.
Touchscreen UI
The Neptune 2 offers a 3.5-inch color touchscreen UI. This touchscreen is responsive; however, when the build platform extends above the screen during printing, it can be hard to read. Additionally, some of the menus are more confusing than helpful.
There is also no active overview of the printer when it is idle. Users cannot view whether the printer is heating, cooling, or already hot. There is no indication of how hot the printer is once it has preheated. This is the kind of information that helps let users know if something is wrong with the printer.
Bed Leveling
The Neptune 2 uses manual bed leveling with some automation from the printer. There are four thumbscrews in the build platform that are used to level the bed. There is also an endstop switch that determines the zero height for the Z-axis. Automated assistance moves the extruder to various points around the bed, allowing users to utilize paper and the thumbscrews to adjust the height difference.
Build Platform
The printer features a removable print bed that is held in place with binder clips. The bed is made of fiberglass that is coated with a sticker for print adhesion. It flexes to release prints. While the sticker offers excellent print adhesion for the projects, its adhesion to the fiberglass is not as strong. Bubbles form where the print pulls the sticker and the fiberglass apart.
Specifications
The Neptune 2 offers a build volume of 220 x 220 x 250 mm. Layer thickness is 0.1 – 0.4 mm while layer height is 0.15 mm.
With the hot end and print bed heatingquickly, the maximum temperature of the extruder is 200°C, while the maximum temperature of the print bed is 50°C.
The maximum print speed is 180mm/s and the printer supports PLA, PETG, ABS, TPU, marble, and wood, among other materials.
Creality Ender 3

The Ender 3 is a compact FDM 3D printer. It offers features like easy assembly and a removable build platform.
Like the Neptune 2, the Ender 3 offers a modest build volume of 220 x 220 x 250 mm. Additionally, both printers feature the same BuildTak-like coated print beds for greater print adhesion.
Unlike the Neptune 2, the Ender 3 does not offer a filament run-out sensor. If users want this feature, they will have to upgrade the printer themselves.
Assembly
The Ender 3 comes partially assembled. Creality provides all the tools needed for assembly in the box. The most complicated parts come preassembled. These include the hotend and the base.
The printer has aluminum extrusions making up its frame. It also features a Bowden-style extruder.
User Interface
While the UI is interactive, it is not a touchscreen. It is controlled manually by a knob that cycles through the menus. The insertion of a microSD card can slow down the function of the UI. Upgrading the microSD card or organizing files into folders can help reduce this problem.
Bed Leveling
Bed leveling is manual for the Ender 3. The first time the print bed is leveled may take a few attempts, but it will need to be as close as possible. This way, it will only require minor tweaking the next time leveling is required.
It is completed by rotating large knobs underneath each corner of the bed. There are arrows on each of the knobs that show which way to turn them to move the bed up or down. Additionally, looking down at the bed, users can rotate the knobs clockwise to raise the bed and counterclockwise to lower it.
Users will need to use a piece of paper to ensure the height is correct, moving the nozzle over each corner of the print bed.
Build Platform
The build plate in the Ender 3 is detachable, allowing easy access for users to remove their completed prints. The sheet is coated in a sticker that allows for greater adhesion of the prints. Additionally, it is slightly flexible, allowing for easy removal of completed prints. If users prefer glass print beds, they have the option of replacing this one with a glass bed.
Specifications
The Ender 3 offers a modest build volume of 220 x 220 x 250 mm. It has a minimum layer height of 100 microns and layer thickness of 0.1 – 0.4mm.
The maximum nozzle temperature is 255°C and the maximum print bed temperature is 110°C.The maximum print speed is 180 mm/s and the printer supports PLA, TPU, and ABS.
Our Recommendation
While both printers offer excellent features, we must break down the differences between the two before users commit to purchasing one or the other. The Neptune 2 offers easy assembly, a filament run-out sensor, and a strongly adhesive, removable print bed. We recommend this printer for beginners.
On the other hand, the Ender 3 does not offer a filament run-out sensor or a touchscreen UI. It does, however, offer easy assembly and an adhesive and removable print bed. We recommend this printer for beginners as well.